Wildfires are part of life. They are a natural disaster. Recently, due to a host of reasons I could write a whole other blog post on, they have become incredibly destructive, gobbling up more acres than ever before…and the homes & communities in their way.
What used to be “unprecedented” is now the norm.
Most of our natural reaction is to want to help in some way. This can soon become overwhelming- it’s hard to know who to trust, if your donation is actually reaching those affected, and what is legitimate.
Government agencies (local, state, and federal) often ethically cannot accept donations, so it’s best to go through non-profit organizations to ensure your gift can actually be used.
Because I live in the Reno area and we’re sandwiched in between the 2 highest priority fires (Dixie Fire & Caldor Fire) in the nation right now, these links are for those areas/fires specifically.
This is an impressive link that includes not only donation sites, but also resources for families (day camps for kids, discount hotel rooms, etc.) that have been affected directly. This list includes donation options for both the California and Nevada sides of these massive fires. Check it out here.
The Nevada Humane Society accepts both monetary and/or supply donations. When evacuations are ordered. not all families are able to get to their homes to rescue their furry friends, so many animals end up displaced. This puts a strain on the local animal rescue centers. Your donations help ease this temporary time of need so these pets can get what they need until their families are able to claim them.
When a firefighter is hurt or killed in the line of duty, the Wildland Firefighter Foundation steps in to aid the family with crisis assistance and finances. They are able to circumvent governmental agency “red tape” and provide help immediately. If you’re ever in the Boise area, you can drop into the center for a visit- it’s a sobering and humbling experience to see all the photos on the wall of those lost in the wildland firefighting community over the years.
We often focus solely on the firefighter efforts on these massive wildfires, which is understandable because they need the thoughts, prayers, and appreciation. However, behind every firefighter is a support system- family, friends, co-workers, etc. – that need our gratitude as well. It’s a tough job being on the other side, so when a tragedy occurs, having an organization like the WFF is priceless.
This is by no means a comprehensive list- it’s meant to help those of you interested in donating or helping in a “not so overwhelming” way. Plus, I’ve been asked by several folks in the last few days so I wanted to get you all a resource in a timely fashion.
Feel free to share a comment below with additional ways to help out…
Have you ever said or thought those words? I definitely have…multiple times. I’ve been disappointed when things and/or people don’t look, feel like, or turn out the way I “thought” they would.
Where does that “thought” come from?
Expectations.
Dang those expectations.
Most recently, my little sweet pup was diagnosed with something no dog owner wants to hear- hip dysplasia. When you have had your dog just over a year and have hiked over 1000 miles with him and have so many future hopes and plans for more of that, this news is devastating.
Tears. Anger. Sadness. Disappointment. Frustration. A lot of “this isn’t fair” thoughts…yep, I’ve done and thought and experienced all that in the last few weeks. In addition to that, I’ve felt shame over being so upset about an animal.
This isn’t the way I thought it would be when I said yes to getting a dog last year.
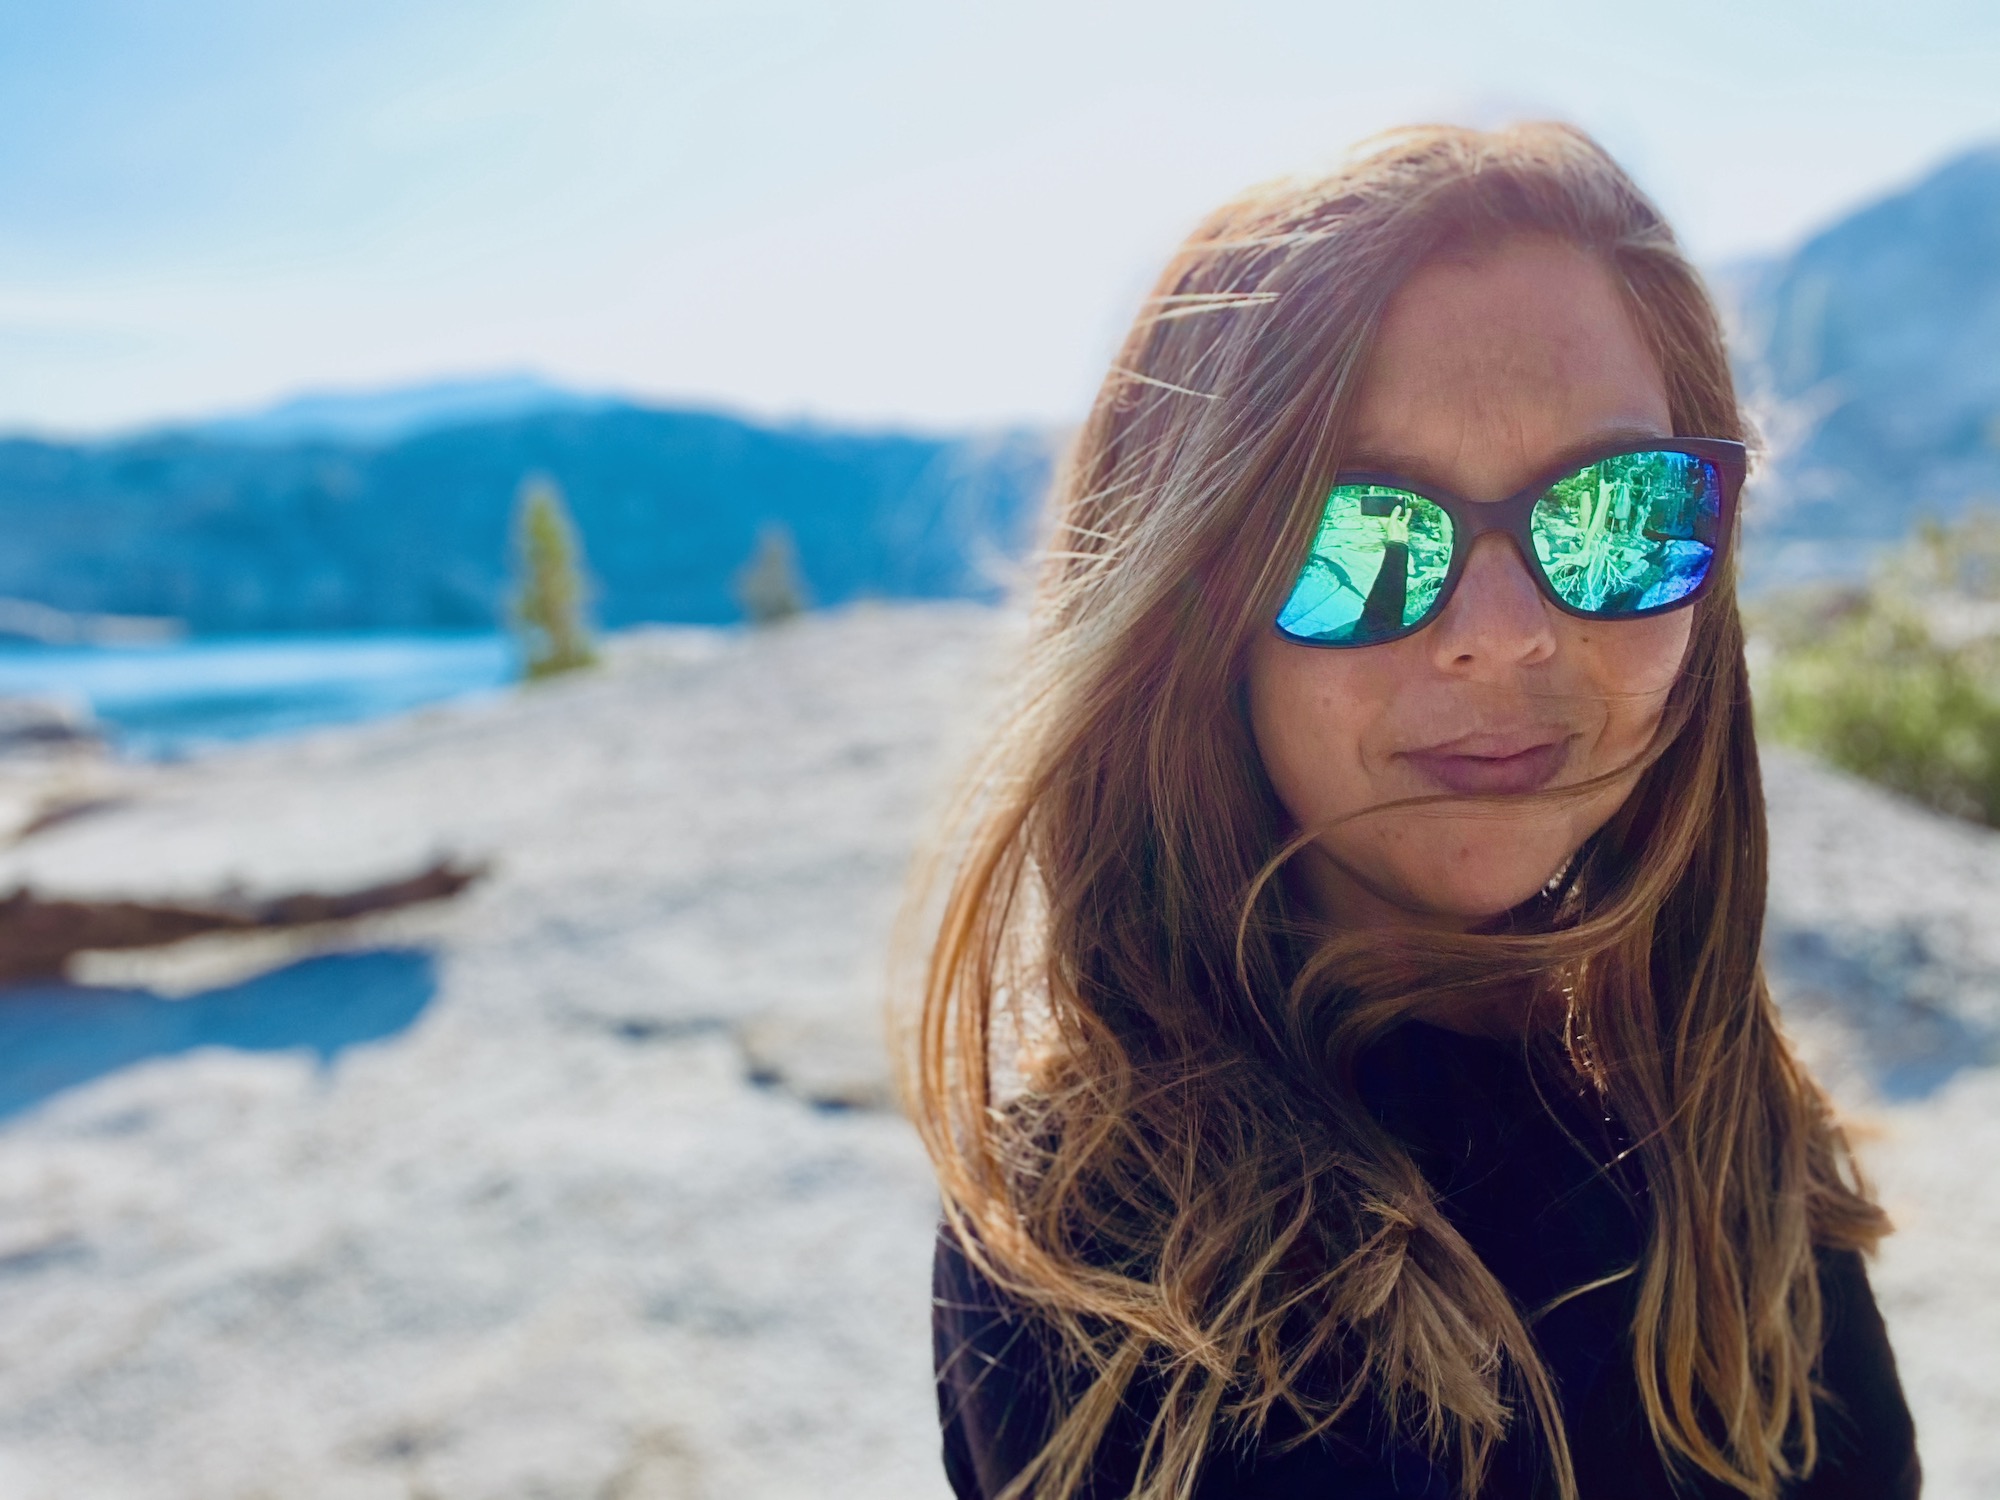
Sully summiting a peak in the Sierra in the summer of 2020.
Becoming a stepparent at 30 years old was an eye opening experience.
It showed me very quickly that my new relationship wasn’t all about the two of us. Rather, I had 2 teenagers that needed love, guidance, encouragement, attention, and boundaries. While I was googlely-eyed over my new husband, one of my step kids was moving into our house the same week we got married. Reality check!
Blissfully unaware of what lay ahead of us on our Central American honeymoon in November of 2014.
Enter all the things that come with a high schooler being in your home. The honeymoon stage took a backseat to being a present and available stepmom. I have zero regrets over this but lemme tell ya, I had some challenges that I couldn’t have ever imagined at a fairly young and inexperience age.
Screaming into my pillow. Tears. Shame. Sadness. Disappointment. A lot of “this isn’t fair” thoughts. Yep…all of that. I am not ashamed to admit I have had moments where I have felt so completed unequipped and unprepared to be in my role that I didn’t know how I could move forward. But somehow here I am, still standing!
This wasn’t the way I thought it would be when I signed up to be a stepparent.
By the grace of God, I have and am learning that this IS life- a series of challenges and events that I must navigate my way through. I can either choose to give up, stay in bed in my sweatpants and refuse to come out (trust me, I’ve been there!). Or, I can take one minute at a time, one small decision at a time…because sometimes a whole day is just too overwhelming to face.
I can admit to friends and family that I’m not ok. That I need help. A listening ear. A hike where we don’t talk about anything serious and just enjoy the moment. I can cry. I can pray, finding gratitude in every blessing that I have (because they’re everywhere) and focus on what I do have, letting go of the things and people I wish were different.
A Sully-less hike the day after taking him to the vet a few weeks ago- girlfriends + the outdoors make everything better.
Letting go of what I thought something or someone would be is what builds character. Endurance. Humble strength. The ability to relate to others who are struggling in an empathetic and meaningful way. Perspective. Appreciation. A peace that surpasses all understanding.
This post contains affiliate links- I may receive a small commission for purchases made directly linked to this post. I highly recommend and have used everything on this page so thank you ahead of time should you choose to purchase something via this post!
As summer quickly approaches, so does backpacking, hiking, and camping season and all the gear that accompanies some of my favorite outdoor activities. When planning for my husband and I’s Tahoe Rim Trail thru-hike in 2019, I attempted to lower our base weights (everything we carried on our backs, excluding food and water) as much as possible to make our overall experience more enjoyable. We initially thought we could use a lot of the gear we already had, but that changed as I realized how much gear has changed and improved. I quickly became willing to replace some of our heavier, older gear with newer, lightweight versions.
The beginnings of our gear pile. Many things shown here wound up being replaced as the realities of our thru-hike endeavor became more clear.
As we prepared for our trip, I initially purchased a Big Agnes Double Sleeping bag. I had visions of the trip being a romantic getaway for the two of us. I quickly learned that although I could pine for romance and connection out there on the trail, a bulky and heavy double sleeping bag wasn’t a realistic option.
Through listening to podcasts and combing through fellow hiker’s gear lists and reviews, I chose to order a UGQ Outdoor Bandit 20° backpacking quilt. Prior to my research, I never even knew something like this existed! Now, it’s accompanied me on every overnight trip into the backcountry that I’ve taken for the last 2 seasons and quickly became one of my favorite pieces of gear in my pack.
What is the difference between a backpacking quilt and a sleeping bag?
When I first heard the word “quilt” associated with backpacking, I envisioned a colorful patterned gigantic blanket on my grandparent’s bed. Obviously, people don’t carry this in their pack.
A backpacking quilt can be unzipped or unbuttoned all the way to become an actual blanket shape. A backpacking quilt is unlike a sleeping bag in this way- most sleeping bags have a zipper that fully encloses it’s user from the foot of the bag towards the head. Depending on the type, you can unzip a sleeping bag most of the way, but often the bottom tapers down to a point, trapping your feet inside.
Quilt on right.
Underside view.
Underside view from the neck down towards the footbox.
Underside view from the footbox towards the neck.
A backpacking quilt has a drawstring at the bottom of it that, when loosened, opens up all the way to become an actual blanket, giving it more versatility in variable conditions.
What is the advantage? If you’re backpacking in the summertime months in certain climates, climbing into an insulated tube each night can feel claustrophobic. The quilt allows you to have good ventilation and more temperature control depending on how you adjust it. On warmer nights, I often loosen the drawstring all the way. This allows the bulk of my body to remain covered, but my feet to be free and well-ventilated.
Fully unzipped sleeping bag vs. quilt.
Backpacking quilts are also different because they aren’t insulated on the majority of the underside. The thought is, when they’re used in conjunction with a sleeping pad, the sleeping pad provides your underside insulation and thus you save on both weight and overall size/bulk with the quilt due to less material overall in the construction. Because I wanted to lighten the load on my back, a 1.5 pound quilt with a 20° rating felt like a great option!
Quilt with sleeping pad inside from top…
…and from underside.
A quilt is a good option for those of us active sleepers. My husband often describes my sleeping technique as a “rotisserie chicken”. I move around a LOT at night and a sleeping bag, especially the mummy style bags, have always been a challenge to sleep in. I end up laying on the zipper or twisted up into a weird knot by morning. The quilt allows me much more room to move around without shifting my entire sleeping situation around.
What are the specifications (options, weight, size, & price point for my quilt?
I went with UGQ Outdoor, a small cottage company based in Jackson, Mississippi. UGQ custom builds their quilts to order, right down to the color. You can choose fill power (level of insulation), temperature rating, width, length, shell color and fabric type, neck and footbox style, and also select from a variety of accessories you may or may not want (storage sacks, extra straps, etc.).
Multiple companies are now making backpacking quilts. I chose UGQ Outdoor because of their amazing customer service. I delayed way too long in deciding which company/quilt to order, so I was up against a tight timeframe when I initially ordered my quilt. They worked with me and I ended up getting it just in time!
Also, I had a lot of questions when I was ordering my quilt- they were easy to communicate with and patient with me. Talking to an actual person when I called their contact number was important to me. If they didn’t answer and I left a message, my phone call was always promptly returned. In a world of automation and impersonal interactions, this stood out to me as a huge positive.
20° temperature rating: You can “batten down the hatches” of a quilt to make it snug and tight like a sleeping bag by cinching the drawstring down tight and utilizing the straps and buttons that run up the backside of the quilt. This gives you maximum warmth when paired with an insulated sleeping pad; however, you want to select a temperature rating of about 10° below the lowest temperature you think you’ll encounter. For example, I wanted something that would work in a low temperature of 30°, so I went with a 20° rating.
850WGD (White Goose Down) Fill Power: I wanted a nice balance between weight and cost, so I went with this option. UGQ Outdoor sources all their down from Responsible Down Standard Partner. If down isn’t your thing, they also offer a Synergy Bandit down alternative quilt.
55″ width and 72″ length: beware of ordering it too short! I am 66″ tall and this is the perfect length for me.
Color: Crimson Red (interior) and Moroccan Blue (exterior) –she’s so pretty!
Foot box style: zipper and drawcord, no taper (I wanted it to be able to unzip my quilt into a regular sized blanket but you can choose the tapered option to cut overall weight even more.
Weight: 1.5 lbs./24 oz.
Size packed: 12″L x 7″W
Price: $283 before shipping
* One option I would have chosen that I originally did not was the overstuff option. They offer to pack the down to 130%, giving you extra warmth and insulation. You can choose this option for the entire quilt or just for the footbed. Because our thru-hike was in August, I didn’t need the additional warmth; however, I’ve taken some late fall trips and used my quilt and wished I had ordered it with the overstuff option.
One of the coldest mornings of our trip- at 9300′- we woke up to frost!
Tips for Backpacking Quilt Users
A few things I’ve learned since having my quilt:
In cool conditions, stuff a sock into the hole at the bottom that is created when you cinch the footboy drawstring down tightly. This will eliminate any draft coming through that opening.
High tech draft eliminator.
Take a sleeping bag liner and/or bivy sack with you if the temps are going to be lower than your quilt is rated for. These can provide you with 30+° of warmth on cool nights.
Always store your quilt loosely in a large mesh sack uncompressed. Over compressing down or synthetic causes it to loose the loftiness that is used to keep you warm.
If you intend to purchase a custom quilt, do it well before your planned trip- they construct them upon you ordering it, and often you’re in line behind multiple others, so it can take 12 weeks+ to actually receive it depending on what company you go with.
With any gear you purchase, the better you care for it both on and off the trail, the longer your investment will last. A great post on general care for your quilt or sleeping bag can be found here.
How do I know if a backpacking quilt is right for me?
A quilt isn’t for everyone. Gear is a personal thing- what works for one person doesn’t work for another. Lightweight backpacking gear can cost you a small fortune, so the more you can research and ask yourself what you think you’ll want out in the backcountry before making this big purchase, the better.
I knew I wanted something lightweight, but I also didn’t want to compromise my own comfort. Sleep is likely the most important thing you can get out on the trail! With my former wildland firefighting job, I spent enough time in sleeping bags to know that I needed a different option to maximize my sleep quality. A backpacking quilt fits my needs perfectly.
Sleep and rest…the most important component while backpacking!
Until you get out there and spend a few nights on the ground, it’s hard to know for sure if a quilt will work for you. I was pretty stoked after night #1 in mine! …which was obviously a huge relief.
Hello! It’s been awhile! I know I’ve been a little distant lately so I thought I’d reach out.
I’d ask how you’ve been but I’m sure I can guess what your answer is. It’s the response of most these days- “BUSY.” It seems like 2020 is your craziest year yet. There has been no shortage of things going on to keep you completely preoccupied.
I can imagine you’re swamped with:
A global pandemic that has changed everyone’s life in some way.
An election that has divided our country like no other election ever has.
Social justice issues that are deep rooted and ongoing.
Devastating wildfires and hurricanes that have destroyed hundreds of homes and wrecked, or even ended lives in their path.
Not to mention the countless opinions of your users regarding all of said activity.
Whew! How do you find the time to rest? It seems like you just don’t. Ever.
You’re always there. Ready to be used and scrolled through at any moment of the day or night. Aren’t you exhausted already? You don’t look like you’re slowing down or taking a break anytime soon.
I’ve been doing some thinking.
I have a confession.
I need space.
I need #MySpace (see what I did there?).
Our relationship started decades ago.
Like most relationships, it was really fun at first. I loved looking up people I hadn’t talked to in years and seeing what they were up to. I loved building my profile out with the perfect soundtrack (anyone recall that option?) and background photo. And those friend requests you would send me! They felt like validation of who I was- people liked me and wanted to be my friend. Seeing that little number increase gave me a sense of confidence.
But you see, that sense of confidence and validation was never meant to be found in YOU.
When we would spend too much time together, I would often part with you feeling worse than before we hung out. Sometimes I would feel depressed seeing what other people were getting to do/buy/be. I would feel empty, wondering why I couldn’t do/buy/be what they were or had. That should have been a sign long ago.
And all those perfectly airbrushed photos of celebrities and “influencers”? Dang…it was torture. Why couldn’t I look like them? Or have even a tenth of what they had?
Like any toxic relationship, it’s been tough to extract myself from you. You’re just always there. Waiting. Ready. Available for me to log into.
I just can’t do what we’ve been doing anymore. It isn’t healthy for me.
To be fair, I think you are really cool in some ways. You allow me to see into people’s lives in a way that is really unique. Not all my friends and family live near me- in fact those closest to me don’t. You give me a window into their lives that compliments that actual relationship I have with them. I can talk TO them on the phone or in-person and see who they are outside of the screen. That is reality. Sometimes, most times actually, you just don’t give an accurate picture of what is real.
I want to see and to be more of what’s real. You don’t often reflect that for me.
I have a finite amount of time, effort, energy, and emotional capacity and the fact is, I’ve let you take WAY too much of all of those from me.
I’ve also allowed you to influence how I feel about people based on what they post. I don’t like that. I want to see a person for who they are, not who they allow you to portray them to be. We are all people first and opinion second (or even further down the line). No longer will I allow you to change how I feel about someone. I want to love those around me and you make it really difficult.
If I’m being 100% honest, you scare me. Do you hear me when I’m not even logged in to you? Suggestions pop up based on things you think I might need or want or be interested in before I even mention them to you. Are you watching me when I don’t realize it? That’s stalker-like. I don’t want you to have access into my mind in that way anymore.
So this is to let you know that I’m taking back the control. I get to say how much I take in of your influence. Basically, I’m telling you that I’m turning you into a tool. If I need you for something, I’ll use you. If I want to intentionally check out a person or a post, I’ll use you for that. But the days of mindlessly scrolling through your pages and spending too much time with you are over.
I still want to be friends, just not spend as much time together. I know you’ll be agreeable to that because I know you aren’t going anywhere.
Also, just so you know, you are the only one I would ever tell this to…because at the end of the day, you just don’t matter that much. You aren’t a person. You aren’t reality. You aren’t meant to be used for hours every day and allowed to speak into my life in the way I’ve allowed you to for years.
It’s not “it’s not you, it’s me.”
…it IS you.
Sincerely,
Dawn
PS- If you need to reach me, I’ve turned all my notifications off, so I’ll get back to you when it works best for me…for my health, my wellbeing, and my time.
Some things, people, and interests are permanently a part of my life, etched into my very being like an ancient petroglyph on stone.
My husband, my love of the outdoors, my devotion to my family, my best friend, my complicated relationship with my own body and food…will always be part of my life in some capacity.
Some of my non-seasonal, permanent relationships.
Not everything is meant to be forever, though. There have been friendships that have come and gone, struggles I’ve gotten over, and interests that meant everything at one point, but are now a faint memory.
And that is ok.
This blog, for example…I have seasons where I have such a strong desire to put ideas to paper (or keyboard) and share them. Other times, like the last few months, I have been more internal. The writing is still happening, but the sharing is more limited.
And that is ok.
I don’t have anyone paying me to do this and holding deadlines over my head. It’s purely a way for me to connect with others via writing and sharing, when it works for ME. That happens seasonally.
I used to be a diehard CrossFitter (insert all the CrossFit jokes here). As my life has morphed into more outdoors than in, and my interests have swung heavily to hiking, backpacking, biking, skiing, and recreating outside, my love for CrossFit dwindled, slowly at first, and now it’s barely a blip on my “things I want to do today” radar.
Getting my CrossFit Level One Certification in 2018.
It was seasonal.
I needed that high intensity workout style for years. I remember counting down the minutes in my cubicle those last few years with the Forest Service, just waiting to get out of there and into the gym. It was my happy place, where I blew off steam, and my primary social outlet.
When CrossFit was life…and I thought I had to throw everything up over my head.
I have a few friendships that were necessary for a particular time period of my life, but were never meant to be lifelong. Perhaps we found something in each other that we needed or could give temporarily, and then due to life changes or job changes, we went our separate ways. And that’s ok!
What I’m trying to say is, I am thankful for seasons. Although change, even expected change, is hard, it also brings forth the new and sometimes unexpected. Creative ideas and my willingness to spend time on them come and go, so my posts will continue to do the same. CrossFit doesn’t feel as good now as it once did, so I’ve found other ways to get a great workout, yet be kind to and listen to my own body’s needs. Past friendships, while special, are just that- in the past.
Like the snow that is (hopefully!) about to start falling, change is an inevitable part of life. Being thankful and mindful in the present moment helps me embrace each season as it comes and goes.
Awaiting another season of winter.
Noticing the seasons reminds me that even the many emotions I feel are temporary. Thank GOD for that!
“This too shall pass” is a beautiful reminder that if your present moment is difficult and dark, lighter and beautiful times are over that next horizon. The scorching heat of summer eventually gives way to cool, crisp fall days, that eventually turn cold (and maybe even white). Then, just about the time we’re tired of the cold, the blossoms and birds of spring start to appear, giving us a new hope that things will get better.
What season are you in right now? What thing, while seemingly endless and challenging, do you need to remind yourself is only here for a season?
Do you know where Winnemucca, Nevada is? It’s a small town in Northern Nevada off Interstate 80 that us Reno-ites drive through on our way to Boise or Salt Lake City. I actually have some dear friends from there, and like anywhere, it has its redeeming qualities and beautiful spots. However, for anyone unfamiliar with rural Nevada, it can definitely seem like a “middle of nowhere” kind of town.
Sully was born in Winnemucca. I don’t know the details of his birth, his parents, the exact location, or anything about the day he came into this world. In fact, I know very little about his first few months of life. What I do know isn’t pretty, but it has a happy ending, so here goes (if you don’t like sad dog stories, skip the next few paragraphs).
Sometime in the Spring of 2018 a man in Winnemucca got sick and wound up in the hospital. He asked a friend of his to go check on his dogs. When his friend went to do this, he found something he didn’t expect to find.
A few of the 100+ dogs found on one property.
This man’s “dogs” turned out to be somewhere between 50-60 Border Collies (along with 40+ puppies) locked up in dirt-floored, chain link fenced-in kennels. They weren’t accustomed to people. They were overcrowded and malnourished. From what I’ve been told they weren’t physically abused but they were seriously neglected. Food was thrown to them over the fence and only the most aggressive and strong ate well.
The details are a bit murky, but I have been told by multiple sources that this man did not have ill intentions, he just had something else going on pertaining to being ill. I truly feel for him and I pray that he got the help he needed.
It took some convincing, but finally he agreed that these dogs would be better suited elsewhere. This initiated a 3-4 month effort by multiple agencies across several states to remove the dogs from the property and relocate them elsewhere. Our dog, Sully, wound up at the Canine Rehabilitation Center and Sanctuary (CRCS) in Washoe Valley, along with his brother. They were some of the last ones to leave the hot Winnemucca sun behind.
Some of the incredible people that helped remove the dogs from the property and put them in better places.
Sully was considered feral when he arrived at CRCS. I imagine (and have been told) that his life up until then had consisted of burrowing holes in his dirt-floored kennel to get away from the other dogs and the intense Nevada elements and trying to get any food he could manage amongst the likely tough crowd. Additionally, the rescue effort was for his well being, but I’m sure was traumatizing nonetheless.
Through the work performed with him in the year or so that he was at CRCS, he slowly began to trust people and come out of his shell. I am forever indebted to the amazing staff and volunteers at CRCS. The healing work they do with these dogs is amazing, and I have proof of that laying next to me as I type these words.
Borrowed from the CRCS Facebook page. When Sully first arrived after being relocated from Winnemucca.
Sully endured a few hardships before coming to live with us. He was taken home by 2 other families that, for whatever reason, wound up bringing him back to the rescue center. I know what the reason for this was, and I’m sure you do too, if you believe in that whole “things happen for a reason” thing.
My family I walked into CRCS this past March after numerous discussions about getting a dog. My previous job fighting wildland fires wasn’t conducive to inviting a dog into our home, but times had changed. I was no longer away for weeks at a time and I had the time to devote to an animal. Also, I was ready. Miles on trails solo had me ready for some companionship and I was excited to expose a dog to a life of true adventure and genuine love.
When Sully was brought out to meet us for the first time, I was taken aback by his good looks and his thick, shiny black coat. He was extremely shy and nervous, and as we walked him around the CRCS campus, like most adoptive parents must do, I kept asking myself, “is this our dog?” We loved him immediately, and I went back to walk him every day for over a week. I felt like he began to recognize me more each time I came, and over this time I think he was also evaluating me. They say that ultimately the dog chooses you, and I definitely saw that this sweet animal was ready for a home and a family to call his own.
Our first day meeting Sully at the Canine Rehabilitation Center and Sanctuary
After a week, we all decided that yes, this was our dog. We were ready to bring him home and he showed signs of being ready to accept us as well. I still remember the feeling when myself and one of the CRCS staff was able to get Sully into the back of my car!
Scenes from visiting Sully at CRCS.
I’ve never driven a newborn home from the hospital, so driving our new dog home was the closest to that I’ve been. I sat in the backseat as Darren drove. I was nervous. I was excited. I was terrified. I had just picked up my first ever (as an adult) dog. I wanted Sully to feel like part of our family and for our home to be his home. Up until Sully came to live with us, he had never lived in a traditional home. He went from a dirt kennel to the rescue center and was now embarking on his journey into his forever family’s lives and home.
One of Sully’s first few mornings in his new home.
With a lot of time, patience, love, consistency, and understanding, the dog we have now is quite different from the dog we brought home this past April. Undoubtedly he is an irreplaceable member of our family now.
Sully and I high above Reno.
Fast forward almost 4 months. Sully has hiked over 300 miles with me (and sometimes Darren!) in Nevada, California, Idaho, Oregon, and Washington. He has gone from being nervous and anxious to being chill at home and a hiking machine on the trail. He is inquisitive and smart. He loves playing with other dogs. He has become one of life’s greatest joys and I am beyond grateful to have this pup to accompany me on my daily adventures. I truly cannot imagine life without him.
Sully in action mode in the Sierra Nevada Mountains.
I often wonder what he’s thinking, as I’m sure most dog-owners do. He has brown eyes and they are deep…sometimes even sad. I tell myself that maybe he’s thinking about his past, or wondering if he’s really here to stay. People tell me he hit the jackpot- that he’s a lucky dog, and they’re right! He’s living a pretty amazing life.
Sully visiting his dad at work.
Honestly though, I think it’s us that scored.
If you’re interested in the work that the Canine Rehabilitation Center and Sanctuary does, you can find out more information and/or donate here.
If you haven’t done much hiking, trail running, or mountain biking, it may be overwhelming to choose a spot to go. I get asked almost weekly for trail recommendations- these are 3 trails in the Reno area that I direct people to. All of these trails can be accessed and downloaded on the AllTrails app.
I believe in protecting the “under the radar” areas I frequent, since very few places are actually still in that category. These trails are all well-used, so I don’t feel like I’m sharing any secrets here.
You’ll notice these are all loop trails. Personally, I love a loop. I also enjoy changing up the direction (clockwise versus counter-clockwise), because if you never look behind you on a trail, you’re only really seeing 50% of the view!
If you’re new to getting outside, or are just looking for some tips before you go, you can find info here.
Best Multi-Use, Year-Round Trail: Keystone Canyon Loop
You know that giant mountain with very few trees that has repeater and cell towers on top of it on the north side of town? If cardinal directions aren’t your jam, the base of Peavine has an “N” on it for the University of Nevada, Reno.
Peavine has no shortage of trails. It is covered from top to bottom with single track, off-road vehicle trails, and even has a road (unpaved) that goes to the top for the utility folks working on the towers. This trail is just one of the countless options on Peavine.
The Keystone Canyon Trail is one of my favorite loops. It’s close to town, easy to access, and stays in great shape year-round (minus post-heavy precipitation). It climbs up towards Hoge Road, a popular mountain bike parking spot, and then descends either back through Keystone Canyon or mid-slope on single track, depending what direction you choose. I prefer clockwise, because I enjoy descending Keystone Canyon proper.
Sunrise hike on the Keystone Canyon Loop.
Uses
hiking
trail running
mountain biking
Best Time to Go
This trail is exposed, so it’s perfect in the fall/winter/spring months when the outdoor temperature is cooler. Wildflowers are common every spring and can be a sight to behold. Note: please leave them for the next person to enjoy!
It is also pleasant in the summer if you can go early, before the heat of the day. Water runs seasonally through Keystone Canyon, but don’t rely on it. If you’re hiking with a dog, this is a good area to pack extra water for them.
Getting There
From I-80 Westbound, take the Virginia Street exit. Turn right on Virginia Street (towards the University). Continue 1.2 miles. Turn left onto North McCarran Blvd. In 1.2 miles, turn right onto Leadership Parkway. Turn right into Keystone Canyon East access, or continue for about .5 miles more to park in Keystone Canyon West access.
Heavy construction is occurring near the Keystone Canyon East access parking area in Spring 2020.The parking lot is still open, but heads-up for heavy machinery.
Photo 1 is the view of the valley from “the bench”. Photo 2 is in Keystone Canyon.
Best “Kick Your Butt” Trail: Hidden Valley Backcountry Loop
Hidden Valley is a community on the east side of the Truckee Meadows at the base of the slope. It is directly east of the SouthEast Connector. Similar to Peavine, this area, accessed via Hidden Valley Regional Park, is full of multiple trail options. I enjoy this particular loop because it’s a lot of elevation gain quickly, meaning you can get a good sweat in a relatively short time frame.
I prefer to walk this loop counter-clockwise; this makes the steepest part the ascent and the descent more gradual. Your climb is worth it, as you get a killer view of the Reno/Sparks area from the top. The trail itself doesn’t top out at the ridge, but you can walk just a bit further to the top to get a full 360°view.
Views from the Hidden Valley Backcountry Loop Trail.
Uses
hiking
trail running
mountain biking
Best Time to Go
This trail is also exposed, so it’s nice in the fall/winter/spring months when the outdoor temperature is cooler. Wildflowers are common every spring and can be a sight to behold. Note: please leave them for the next person to enjoy!
There is NO water along this trail. Plan accordingly! Hidden Valley Regional Park has drinking fountains, but don’t rely on these as sometimes they are not working.
Getting There
From I-80 Eastbound, take the Sparks Blvd. exit and turn right onto Sparks Blvd. In 2.5 miles, turn left onto Pembroke Drive. In .8 miles turn right onto Parkway Drive. Go about .5 mile and enter the park. Take your first left and continue up towards the foothills. The road will veer right; continue on. A large parking lot will be on your right (directly above the horse arena). Park there.
Best Trail for After the Snow Melts: Dry Pond Loop
If you enjoy trees and creeks, this is a beautiful option. The Dry Pond Loop is part of a trail system on the Humboldt-Toiyabe National Forest in South Reno just off Mount Rose Highway. The trail ascends a creek drainage, crests a saddle where the dry pond lies, and then descends into another creek drainage.
If it’s early in the day, I prefer to hike this one clockwise (ascending White’s Creek and descending Thomas Creek). There is an exposed southern aspect as you climb out of White’s Creek that can get very warm later in the day and in the summer. Both Whites and Thomas Creek have water in them year-round. In fact, springtime water flow can be very high, so there are bridges to cross in designated areas.
Dry Pond, with Mt. Rose Ski Tahoe in the background.
Uses
hiking
trail running
mountain biking
fishing
horseback riding
snowshoeing
Best Time to Go
This is a late spring, summer, and early fall hike. Once the snow starts to fly, this trail becomes unusable for hiking (but useable for snowshoeing), especially up high.
The Dry Pond Loop is nice early on a warm summer day when some of the more exposed trails are too hot to hike. It is also stunning in the fall, especially the Thomas Creek side, with all the leaves changing colors.
Scenes from the Dry Pond Loop trail.
Getting There
From I-580 South, take the Mount Rose Hwy. exit onto SR-431. Keep right onto Mount Rose Hwy. toward Lake Tahoe. In 4.6 miles, turn right onto Timberline Drive.
From Timberline Drive, you have several options, depending on which direction you’d like to go and where you’d like to park. You can park either at the bottom of the White’s Creek Road (.6 miles down Timberline) or at the bottom of the Thomas Creek Road (1.5 miles down Timberline).
There are private residences along Timberline Road. Be mindful when you’re parking; please don’t block anyone’s driveway or road access.
Before you go, please consider…
Mud: If it has rained or snowed recently and trails are muddy, stay off of them. It creates a mess, and often people want to step off the trail. This can easily create undesignated trails and can harm sensitive plant and animal species.
Snakes: Yep, they’re out there. Heads up, especially on warmer days.
Ticks: Again, yep, they’re out there. Be aware of this if you’re stepping off trail to use the restroom. Thoroughly check yourself and your dogs post-hike.
Fellow recreationists: Know who yields to who and be courteous. As a hiker, I step off the trail for bikes, even though they yield to me. It’s just a nice thing to do, and much easier for me than for them!
Dogs: Please be considerate of others with your dogs. As a new dog owner, I am learning a whole new trail etiquette. Pick up and carry you dog’s poop out. Also, don’t let them run up to others…not everyone likes this! Some trails (Dry Pond Loop) have strict leash laws. Be aware of these.
Secure your vehicle: Don’t leave anything valuable in sight; lock your doors/roll up your windows.
Overall awareness: If you want to wear headphones on the trail, no judgement. Just ensure you’re aware of your surroundings. Please adjust your volume so you can hear if someone or something is coming up behind you. Safety first!
LEAVE NO TRACE: These trails are all heavily-used, and we want to keep using them for years to come. Please adhere to the LNT Principles at all times.
What is happening right now isn’t simple. It’s complex. It’s scary. It’s hard. It’s lonely. It has changed everything. It has affected everyone, in one way or another. Since we are all individuals we are all affected in individual ways, which means we are also all handling this differently.
And that is ok.
My worries. concerns, and struggles are much different than my friend who owns a small business that was forced to close or has taken a huge financial hit. Or my sister who is a hair stylist. Or my stepson who is in college. Or my friends and family who are in the medical field. Or my local grocery store clerk.
I’ve heard it described as “going through the same storm, but in different boats”, and I certainly believe this to be true.
Same storm, different boats.
I wonder, though, if any of you can relate to one of the mental hurdles I’ve been attempting to clear as I journey through the COVID-19 storm in my boat.
I have struggled with a recurring thought that often starts with, “I should ___.”
I should build and perfect the business I’ve been working on.
I should tune up my diet.
I should begin every day with stretching or meditation.
I should meal plan and prep every week.
I should figure out a way to contribute to a cause.
I should read more.
I should be able to cook dinner every night without complaint.
I should write a blog post.
I should feel _____
I should.
I should.
I should.
Yep, I’ve “shoulded” all over myself and most of the time, it leaves me feeling guilty and less than. Inadequate. Scrolling through social media or the news and coming up depressed and anxious. Lonely. Even angry at times.
Should isn’t always a negative; it can be the catalyst for motivation and change. But it has to be rooted in a conscious choice. For example, if I want to build up my savings account, there are changes I “should” make regarding my expenditures. That internal prompting regarding what I “should and shouldn’t” be purchasing can help me attain my goal, which is based on, again, a conscious choice.
Should isn’t always a negative. I said I “should” backpack more last year, so I did, and it took me places like this.
However, when those “shoulds” aren’t based on a personal choice, but rather on what others think of me, or an outside expectation, “should” becomes a burden, and it isn’t mine to carry. After going down the “I’m not doing enough” path for awhile, when I’m aware I’m wandering aimlessly on it, I try to do the following:
I stop. I mindfully notice where my thoughts are taking me and I stop the train. I observe, judgement-free.
I looked at my life and the decisions I have made that have placed me where I am right now; these decisions have been jointly made with my husband and are based on what we believe is best for our family. We are solid in them. We are at peace with them.
I remind myself of this.
I tell myself that I am exactly where I need to be right now.
I pray, asking for the strength to let go.
I get outside, where I remember that nature and its Creator’s wisdom is much bigger than me. It tells me I’m in the exact right place, and to stop and take notice of the beauty and the blessings all around me.
I then repeat this process the next time I inevitably feel those feelings creep back in.
This allows me to move forward, leaving the bull “should” behind me. I return to things I’ve written to remind myself of this. I speak with my trusted family and friends. I express my thoughts to my husband. I write.
A popular phrase right now is “living my best life”. What does that even mean? “Should” we all be out there attempting to do this? It feels a little unattainable, especially when most of our choices are pretty limited, especially if you’re still in one of the states asking folks to stay home.
However, that implies that your “best life” is purely circumstantial, and when things are on the up and up, there we are, “living our best lives”. I say no to that. I don’t want my life to be defined by my circumstances. I say yes to “living my chosen life”, though. It gives me more ownership, and while sometimes circumstances aren’t ideal, I know I can decide what “should” I’m going to allow time and space in my life.
Should I have been doing something else instead of summiting a peak with friends? Nope.
This isn’t easy. It’s a process and a practice; a constant repetition of realizing, remembering, and redirecting. Freeing myself from the expectations outside of me has allowed me to find just that…true freedom. In freedom I can access joy- the kind that is based on more than just a fleeting emotion.
And isn’t that exactly what we could all use more of right now?
I wrote this almost 1 week ago…and then didn’t have the focus to post it, which speaks directly to the content itself.
Our world, as we know it, is changed. We are changed. From here forward things will look different. We will be different.
The day before yesterday my family and I had taken most of the day to deep clean our home. We wiped down every surface, disinfected floors, and enacted a “no-shoes in the house rule”. We came up with a family plan, one that included what we were going to do, what we were going to stop doing, and what we were going to limit ourselves to. In this process, I gained a small sense of “control” in the midst of a lot of unknowns, mixed information, fear, and confusion.
Then came yesterday. The day started out nicely, with us “attending” church from our living room. The sermon was applicable, titled “The Beauty of Being Stuck”. It called us to find ways to collaborate with others even in the midst of distancing ourselves from them physically. Sweet. I liked it.
The afternoon found me confused, frustrated, and anxious. I was pacing around the house trying to FINISH something, but the problem was, I couldn’t concentrate. I couldn’t focus on ANYthing, except regularly unlocking my phone and reading the latest news. (#unhelpful)
I put on a crap tv show to distract myself, which usually works. I can’t even tell you what it was or what it was about. I couldn’t pay attention.
I stress ate. I don’t even like cereal and I had 2 bowls of it, along with other miscellaneous food items. This left me feeling sick, as stress eating often does.
I sat down to do my favorite thing when I can’t focus…write. But the words wouldn’t come. I had no words.
So…I jumped in my car and drove to a trailhead. Nevermind that a storm was raging in the Sierra. Nevermind that the trail was wet and muddy. Nevermind that it was freezing cold. I bundled up and took off.
I needed to walk.
So I did. I put one foot in front of the other. I started out listening to a podcast. Even though the words were interesting, my mind wasn’t processing them; I might as well have been listening to white noise. I switched it to a playlist on my Spotify profile titled “trust”, full of songs with words that I believe are true and that lift my spirits.
It worked.
Without even prompting myself to do so I mentally began listing all the things I am grateful for right now. I did this for almost the whole 5 miles. I came back to my car in a different state than I was when I left it. I let go. I prayed. I told God the truths that I believe about Him. I thanked Him for loving me. I saw the beauty in the storm, and in being in the storm, but still standing. An unexplainable peace settled in my heart.
Finding peace through moving meditation and mud.
I do not know what the future here on earth holds. None of us do. What I do know is that yesterday, I was struggling. I was feeling the weight of what is happening right now. I felt fear trying to creep in. I was lost without the things I usually rely on to bring me peace. My walk redirected my busy mind to the one thing that brings me true peace, no matter what the circumstances are, which is my faith.
I share all of this to encourage you. Can you relate with the state of mind I described? I know I am not alone in this.
You are not alone right now, either. We are all processing and dealing with this in different ways, but we actually are all in this together, social distancing aside.
When you get stuck, do something that brings you peace. Look for the things you still can do rather focusing on what you can’t. Reach out to a friend or family member. Tell them you’re struggling. Distancing yourself from others physically doesn’t mean you have to emotionally. In fact, it’s even MORE important to stay connected with your support system right now.
Finding ways you can contribute is helpful. I find that when I take the focus off myself, my feelings, my worries, and place that focus on how I can help others, I end up helping myself and my mindset in the process. Even though most of us aren’t in contact with those beyond our immediate household, we can still help others out.
What are your strengths? What are you passionate about? What or who are you thankful for? Write your ideas down and figure out how to creatively execute them. Maybe it’s supporting your local small businesses that are struggling to stay open during this time. Perhaps you’re an encourager and a people-person, so you do something to lift others spirits right now.
Personally, along with being outdoors, I’m passionate about true connection, so this whole “not being around people” is tough. However, there are still ways I can reach out to my friends and family right now and tell them I love them. Check in on them. Be present and available.
Remember to have patience and grace with yourselves and those around you. We’re all trying to figure out how to best navigate our way through these uncharted waters right now. Perhaps your greatest contribution right now is remaining calm and steady during this chaotic and rapidly-changing time. We can always use more of that!
The trail ahead is unknown, but it doesn’t mean we have to live in a constant state of fear.
There is no better time to put aside our differences, recognize what connects us, and meet each other there. I am encouraged when I see the ways our community has come together to support and lift each other up. I am proud when I read the good news stories, or see how appreciative we have become for some of the occupations we once took for granted.
Let’s keep it up, friends! We are all stronger together, collectively, than independently. Reach out, find/do/surrender to what brings you peace, and KNOW that you are not doing this by yourself.
This is a comprehensive guide to hiking the Tahoe Rim Trail based on completing it in 2019.
In this post I’ll address:
Timeframe– when we were going to start/finish and how long we were giving ourselves.
Itinerary– a loose plan of daily mileage and camp locations so we could figure out how many days of food we were going to carry and where our re-supply points would be.
This post contains affiliate links- I may receive a small commission for purchases made directly linked to this post. I highly recommend and have used everything on this page so thanks ahead of time should you choose to purchase something!
If reading isn’t your thing, you can watch the video of our experience here.
Ok, let’s go!
“So, what do you think about hiking the Tahoe Rim Trail…all at once?” I asked Darren, my husband, in March of 2019. To my surprise, he said, “let’s do it!”
Ok, maybe the exclamation point is a little overkill, but what matters is that he agreed. With those words we began our planning process for the 165+ mile loop around Lake Tahoe on the Tahoe Rim Trail, or TRT. Here are the nitty gritty details of our adventure, what worked, what didn’t, and how to start if this is something you’d like to add to your list.
Ok, we’re actually going to attempt to hike the entire way around Lake Tahoe. Now what?
The Tahoe Rim Trail, a 165+ mile loop trail around Lake Tahoe’s rim.
Thru-hiking or through-hiking, is to hike an established end-to-end hiking trail or long-distance trail with continuous footsteps in one direction. The Appalachian Trail Conservancy also defines a thru-hike as one completed within a twelve-month period.
Since we had only done one overnight backpacking trip as a couple (and probably carried 50+ pounds of gear each on that trip), we knew we had a lot to learn. I began by watching a number of gear reviews on YouTube (Darwin on the Trail and Dixie of Homemade Wanderlust were our main go-to channels) and listening to every episode of the Backpacker Radio podcast from start to finish. I also became an avid reader of numerous articles on The Trek, a site that has an unbelievable amount of information pertaining to thru-hiking. These all focus mostly on longer thru-hikes like the Pacific Crest Trail, Appalachian Trail, and Continental Divide Trail; however, other than some different types of gear for different climates, everything I learned easily translated to a shorter thru-hike like the TRT.
I used the Tahoe Rim Trail Association (TRTA) site regularly throughout the planning process and even while on trail. It has sample itineraries, gear lists, trail condition reports, maps, re-supply information (important unless you want to carry all food and supplies for your entire hike), water sources, etc. If you want to try this but want a little more support, the TRTA hosts guided hikes throughout the season; you generally have to apply for those mid-winter. You can also sign up to volunteer with them, which is a great way to pay it forward for using the trail others have worked so hard to build and maintain.
These resources helped us figure out what we needed to focus on in our planning process.
We knew we wanted to take our time, as well as take a zero day (a full day off) in the middle of the hike. We looked at a calendar and randomly chose 2 weeks in mid-July (13th-27th), secured the time off work, and began creating our itinerary based on the days we set aside. We planned our trip for 14 days: 7 days of hiking, 1 day off, then 6 days of hiking, averaging 12-13 miles/day.
The 2018/2019 winter in the Sierra Nevada Mountains was huge, with a 200%+ snowpack and storms still happening well into the late spring. Since we live in the area and hike regularly, I was able to take multiple scouting trips to monitor trail conditions in relation to snow. In mid-June there was still a significant amount of snow on the trail, specifically on the northern aspects. We both looked into our work schedules and after making some changes, decided to push the trip back a full 2 weeks to July 29th-August 11th.
Late Spring 2019 on Donner Pass, just northwest of the TRT.
Was our timeframe a good one?
Yes.
It was nice to have freedom to take our time. This gave us a few shorter days, mileage-wise, which wound up being helpful with the blister issues I encountered (read on). However, even considering that, we could have shortened our trip by at least 1 day. But, since we already had the time off, we put it to good use and enjoyed the few leisurely days the extra time afforded us. We met a few people on the trail who had shorter time frames and said they felt rushed; it was less stressful knowing we weren’t in that position.
It was also nice knowing we could stop and talk to people along the trail and not feel pressured to rush that because we had “big mile days” (our shortest day was 9 miles and our longest day was around 19.5 miles) to get to our next destination. The social aspect of a trail is unique and is something I wouldn’t have wanted to miss due to a tight timeframe.
This decision to push our trip back 2 weeks ended up being an excellent one; the snow on the trail was minimal and we were blessed with incredible weather the whole time.
August 2, 2019 coming off the north side of Dick’s Pass.
If you’re trying to figure out when and how long to do a hike like this, try to give yourself at least a day on the back end to recover. We came home and had a few days of rest before returning to work. This gave us time to reorganize and assimilate back into our daily routines, which was incredibly needed.
Once we had our timeframe narrowed down, we could start planning our itinerary. We knew we wanted to take our zero day in Tahoe City. Tahoe City is smaller, and easier to access from the trail than South Lake Tahoe. It’s also more laid back and overall just more our scene. Because of this, we knew we needed to start somewhere on the other side of the lake.
Note: If actually touching the water of Lake Tahoe is on your list, do it in Tahoe City! It’s the closest you’re going to get to it. You see the lake most of the hike, but the Tahoe Rim Trail doesn’t ever go directly next to Lake Tahoe; it stays mostly up on the rim (hence, the name).
Pre-hike planning session!
We decided to start at the Kingsbury South trailhead, since that is where we left off the year prior from the section hikes we’d completed. A phone call to Heavenly Ski Area Security a few weeks prior to our start date ensured they had our vehicle and contact information as well as our start/finish dates.
The Parking and Access page on the TRT website is helpful for deciding what your options are, as well as providing specific information about different trailhead parking lots and considerations. Pay attention, because even though we thought our parking location wasn’t an issue, when we arrived back after finishing, they were trying to clear the entire lot to repave it and said we might have been towed if we were a day later. Yikes!
Once we knew our starting location, we began planning our daily miles and approximate camp locations. We knew we wanted freedom, but we also needed some type of schedule to give to our friends and family who were helping to re-supply us. We chose a schedule where we would carry at most 4 days of food and would end up averaging 13-14 miles/day.
We left a copy of this with our friends and family who helped us re-supply along the way.
We also chose to go clockwise. The east side of the TRT is notoriously dry, making water sources few and far between. Although this wasn’t a huge issue in 2019 due to the high snow year, we chose to do the section where water was more plentiful (hence, lighter packs) first.
When our itinerary was set, we made our hotel reservations in Tahoe City. Lake Tahoe is a prime tourist destination, especially during the summer months. We made our reservations several months in advance (and had to change them when we decided to push our trip back). Our itinerary put us into town on a Sunday, which made the already high-season rate, higher; you may be able to get a lower rate if you stay overnight during the week.
Once we had our general schedule decided, we could get a permit for the Desolation Wilderness. Permits are required to enter the Desolation Wilderness, and you must give the Forest Service your entrance and exit dates when you call to reserve one. When I called, the Forest Service Recreation Specialist told me most people were getting a permit for 4 days (entering on August 1st and exiting on August 4th), which is what I did; however, we entered on August 1st and exited on August 2nd. There was no issue here, since we did enter on our permitted date.
As a thru-hiker, you can bypass the quota (they only issue a certain number of permits per day from the Friday of Memorial Day weekend to September 30th to disperse users in order to preserve the solitude of this smaller wilderness area) system; however, you still must secure the permit before entering. Permits are $10 per person plus a $10 processing fee. The Regulation & Permits section of the TRTA website is the starting point, or contact the Forest Service Supervisor’s Office in South Lake Tahoe at (530) 543-2694 Monday-Friday, 8AM-4:30PM Pacific Time.
I got our permit 2 weeks prior to our start date over the phone. It was mailed to me (you still need to carry the paper copy) and I received it a few days later.
Note: You also need a California Campfire Permit to operate a portable stove. You can obtain one for FREE after watching a short video and answering some questions here. These are good through the end of the calendar year.
The mileages below were calculated via several methods (Apple Watch, Guthook app, maps). Our total mileage upon completion was closer to 185 miles, but we figured it was somewhere between 175-185. The TRTA still says it’s 165 miles, but there have been several re-routes and changes to the trail. Additionally, there were a few viewpoints and options we chose to hike to along the trail as well.
Guthook app…priceless!
For navigation, Guthook Guides was our go-to. This app is invaluable. It’s a free app but we paid $14.99 for the downloadable map of the entire TRT. We were able to use all the map features without cell service. Features included water sources, mileage markers, additional interesting information, hiker notes, campsite, etc. Darren carried a paper map as backup, should our technology fail; however, we had great success using Guthook the entire hike.
Day 1- Kingsbury South to Star Lake (9 miles)
First photo on the trail. We were doing it!
Starting off with a shorter day proved helpful. We got a late morning start and were able to take our time as we got used to our pack weight and gear. Yes, we had hiked with our packs and gear prior to hitting the trail, but it does feel different once you know you have 165+ miles ahead of you!
This section of the trail was an incredible kickoff for our adventure, with breathtaking views of the Carson Valley, wildflowers, and the Job’s/Freel Peak area. The numerous creeks along this section gave us a chance to try our water filtration system out for the first time on trail. We DID try it at home before we left, which made the trail trial a lot easier!
We camped at Star Lake that evening and treated ourselves to a dip in the lake and an early dinner. Arriving at camp early was again, helpful, because it gave us a chance to establish camp, as well as figure out our methods/routines (cooking, setting up the tent, clean up, hanging the bear bag) all in the daylight.
We followed Leave No Trace principles on our hike, including securing our food every evening before bed. The TRTA recommends a bear proof canister but we felt confident in our hanging skills and never had an issue.
Highs & Lows
Mile 1…we were ON the trail we’d planned so long for!
Star Lake. My favorite camp spot of the trip.
Turns out I don’t sleep well in a tent. I would wake up between 2-4am every morning for the remainder of the hike.
It. Is. Beautiful. This trail is already so stunning and we’ve barely scratched the surface. I feel so blessed and grateful to have the opportunity to be out here doing this. Thank you, God! …excerpt from my journal on the evening of July 30th
Day 2- Star Lake to Round Lake (18 miles)
We began the day with a climb up to Freel Pass, encountering many day hikers headed up to the Jobs/Freel Peak area. We took the time to stop and chat with several of them who were interested in what we were trying to accomplish.
Coming off the south end of Freel Pass.
We were shooting to camp in the Big Meadow area, but were tipped off by another set of thru-hikers who told us that Round Lake was a nice spot, so we pushed on. Side note: these hikers were both Triple Crowners, meaning they had completed the Pacific Crest Trail (2650 miles), the Continental Divide Trail (3100 miles) and the Appalachian Trail (2180 miles). They were trying to complete the TRT in 6 days and still took the time to stop and talk to us. The trail community is amazing!
18 miles was probably a bit overambitious for day 2, although when you’re on the trail by 6-7am due to long summer days, you can certainly hike the miles. However, my blisters began on day 4 and I think this long day early-on might have contributed to those issues.
Big Meadow, day 2
Highs
Talking to Joe and Ashlyn, the impressive and super humble Triple Crowners at the Highway 89/Big Meadow parking lot.
My husband hiking 18 miles. He surprised himself…and me!
We ran into a lot of day hikers and had lovely conversations with some of them about our thru-hike. People are stoked for us. It’s truly motivating…excerpt from my journal on the evening of July 31st
Day 3- Round Lake to Benwood Meadows Creek area (11 miles)
This was an exceptionally peaceful morning hiking through Meiss Meadows to the most southern point of the trail. Here the trail joined up with the Pacific Crest Trail (PCT), a 2650 mile trail between Canada and Mexico. We knew this would be a shorter day for us since we were meeting friends for our first re-supply the next morning, so we took our time.
The Pacific Crest Trail and the Tahoe Rim Trail intersect for about 50 miles. This marker is the very southernmost portion of the TRT.
We enjoyed a long, late breakfast at Showers Lake, where we also took advantage of the sunshine and breeze and rinsed our dirty clothes out. Locating a good, flat campsite for the evening, we pitched our tent and put out a still-hot campfire from some careless campers before us.
Camp chores- water collection, sock aerating, firefighting.
Note: Campfires are prohibited on the entire Tahoe Rim Trail.
Highs
Joining up with the Pacific Crest Trail. It’s a dream of mine to thru-hike the PCT “one day“.
Views on the trail below Little Round Peak. Encountered our first snow, which wasn’t enough to be a nuisance, just fun.
Stopping and talking to FROGGY (his trail name…F-ing Really Old Guy Getting Young), a PCT thru-hiker trying to finish up a section wildfires kept him off of the previous year.
Stellar camp site near Benwood Meadows Creek.
We feel like we’re finding our routine and rhythm a little more each day, each meal, each water fill, each bear hang, each mile. We both have our roles but also help each other out as needed. Loving this simple life…excerpt from my journal on the evening of August 1st
Day 4- Benwood Meadows Creek area to Gilmore Lake (17 miles) , re-supply location #1 of 3
Re-supply day! We had arranged for friends to meet us in the Echo Lakes parking lot mid-morning and hurriedly made our way towards them.
Note…get yourself some friends with an awesome Mercedes Sprinter van who bring chairs (an absolute delight in a trail world of pointy, unlevel seats), hot coffee, fresh fruit, warm smiles and excitement to help with the next leg of your adventure.
Organizing and sorting gear and food on our re-supply.
We spent a few hours with them visiting and preparing for the next section of trail with our pre-packed re-supply boxes. Our friends hiked a 3-mile section around Echo Lakes with us, which was also a total morale booster, and then left us not far before we entered the Desolation Wilderness.
Friends make the miles fly by.
We stopped for a swim in Lake Aloha before continuing to our destination for the night, Gilmore Lake. We knew we had to summit Dick’s Pass the next day and wanted to set ourselves up for an early morning departure.
Lake Aloha, day 4
Highs & Lows
Our incredibly fun, uplifting re-supply morning with friends.
Lake Aloha. Just experience it.
Drinking Coors Light at dinner, hidden in our packs by our friend. We lightened the load and got a treat!
Blisters began appearing on each of my feet, making the last few miles up to Gilmore Lake pretty painful.
The mosquitos came out in full force at Gilmore Lake when we were trying to set up camp. Our headnets and bug spray were invaluable!
The glamour of thru-hiking.
Going to bed sore, but happy and knowing that any adversity out here is truly just part of the experience…excerpt from my journal on the evening of August 2nd
Day 5- Gilmore Lake to Richardson Lake (16 miles)
There are fewer more peaceful places on earth than an early morning on trail.
Heading up and over Dick’s Pass first thing in the morning was an incredible climb with a view I’ll always remember. Also, since we got up there so early, we had it to ourselves the whole time we were on top.
Taking a moment to take it all in on Dick’s Pass.
We ran into the most snow coming off Dick’s Pass, with giant drifts still intact on the north aspect. This made for interesting navigation of the trail in a few spots. If you go on a big snow year, I cannot stress how important it is to know where you are and where you’re going, as well as where the trail goes. It took a team-effort on our way down to Dick’s Lake to stay on the trail; it was obvious many different routes through the snow had been created by all the previous hikers in the season.
We encountered numerous TRT and PCT thru-hikers in this section, which continued to make for great conversation stops. We exited the Desolation Wilderness late-afternoon and continued on a few miles to Richardson Lake for the evening.
Highs & Lows
The view from Dick’s Pass.
A long, late breakfast and foot soak at Fontanillis Lake, just north of Dicks Pass.
Tough day for my feet…the blisters seemed to be multiplying.
Richardson Lake is accessible by vehicle, so camping was a bit crowded.
This was definitely not part of my plan.
My toughest day yet. The 7 blisters between both feet have made walking extremely painful and arduous…this day was survival mode for me, but Darren is doing awesome. I am so grateful for him right now…excerpt from my journal on the evening of August 3rd
Day 6- Richardson Lake to Granite Chief Wilderness border (11 miles)
This was probably one of the most populated days we had on trail. The Barker Pass area is a well-used hiking spot, as well as a main access point for the Rubicon Jeep/ATV trail. It was also Saturday, and it was nice to see so many day hikers out recreating.
I had my It’s All Part of the Experience moment during the heat of this day, forcing us to take an unexpected several hour mid-day break. I hadn’t realized how irritated and swollen my blisters had become and unfortunately one burst as I was hiking. Ouch.
We all have our breaking point- I found mine on Day 6.
We were lucky enough to secure the one campsite at the Granite Chief Wilderness border, which was good because there was a large TRTA guided group camped at the next site to the north in the Twin Peaks area.
The views never get old.
Highs & Lows
Our quiet, cozy campsite at the wilderness border. No wind and no bugs!
I had thought the previous day was tough, but this was by far the hardest day, blister-wise. Read about my meltdown in It’s All Part of the Experience.
I learned today that I can do hard things, like hike the last however many (40ish?) miles on blistered feet. Beer is in the near future!…excerpt from my journal on the evening of August 4th
Day 7- Granite Chief Wilderness border to Tahoe City (12 miles)
Paige Meadows, day 7
We began the day with a long 6-mile descent into Ward Creek, with stunning views into Alpine Meadows and over towards Squaw Valley. Descending into Tahoe City, we could hear the shouts of people floating the Truckee River before we could see them. We stopped at a picnic table before walking into town to “clean up”, aka, babywipe shower.
We arrived into Tahoe City, as planned, on a Sunday, and we were glad we had pre-made our hotel reservations because town was very busy. Mexican food and a cold beer never tasted so good.
A shower, clean clothes, and family- a welcome sight after 6+ days on the trail.
Highs & Lows
Arriving in Tahoe City knowing we had 90-ish miles of trail behind us. We were more than halfway!
A soft bed, a shower (or 2!), beer, and having our son come up from Reno to have dinner with us.
The 6-mile downhill into Ward Creek was tough on the old legs and blistered feet.
Happy for rest…excerpt from my journal on the evening of August 4th
Day 8- Zero Day (day off) in Tahoe City, re-supply location #2 of 3
The week prior to our start date, we went up to Tahoe City and staged our resupply box at the hotel we stayed at. This isn’t something the hotel will typically do(so we won’t advertise who it was), but we found a nice employee who helped us out by keeping it for us. We put a clean set of clothes, comfy footwear, and swimsuits inside the box, as well as toiletries and items we knew we would enjoy having on our day off.
Note- find a room with surface area to spread out and re-organize your gear.
I knew I had to make some adjustments for my feet, so I went and bought a few pairs of Injinji toe socks and swapped these out with the ones I’d been wearing. These, in addition to some advice from a podiatrist friend, helped immensely in the following miles. Alpenglow Sports in downtown Tahoe City had friendly, helpful staff, and a great selection of gear and essentials any thru-hiker could need.
Us and our packs in front of our Tahoe City hotel.
Day 9- Tahoe City to Lake Watson (15 miles)
Just above Highway 89 looking into Squaw Valley.
After 2 lovely evenings and a whole day off from hiking, we were ready to once again hit the trail. We staged our re-supply leftovers (including our “day off” clothes) box at an undisclosed location (I returned after we finished to pick it up…you could also mail it home if you didn’t have connections in Tahoe City) and returned to the trail. We moved pretty slow the first few miles after a day of a lot of food, ice cream, and beer (#worthit).
Pooped.
This was the day we saw the only bear(s) we saw on our hike. I spotted a mama bear and her 2 cubs a few hundred yards ahead of us, mid-morning. We stayed quiet as they crossed over the trail, gave them space, and let them pass. Once they were clear of the trail, we made ourselves heard and hiked on.
Highs & Lows
Actually wanting to get back on the trail was a nice feeling. We were 100% in sync with each other and trail life.
Blisters were still an issue, but either I was getting used to them or the day off helped.
Bear bins at Lake Watson gave Darren a night off from hanging the bear bag.
Lake Watson was slightly creepy. You can access this lake by road and a few people looked like they’d been living up there for some time. We were relieved when other hikers showed up and camped near us.
Running like a well-oiled machine at this point.
…it’s hard to believe we’ve hiked as far as we have and been out here this long…excerpt from my journal on the evening of August 6th
Day 10- Lake Watson to Gray Lake (19 miles)
We got an early start and loaded all the way up with water (about 5 liters each) in Watson Creek. This would be our longest stretch of the trail without water…over 17 miles. Prior to this day, we had been able to hike with 1-2 liters of water at a time due to the sources being so plentiful.
We met up with another thru-hiker, Paul, who we leap-frogged with all day. We ended up having lunch with him at a scenic spot just off the trail and he made for great conversation and company.
Still smiling and happily married. Note: if you’re on trail and someone offers to take your photo, let them.
We crossed back over into Nevada and into the Mount Rose Wilderness. We opted to detour a mile off trail down into Gray’s Lake to ensure we had a good water supply for the evening. It was a peaceful camp site and the water coming out of the lake was fresh, clear, and cold.
Highs
A hiking companion. Even though Darren and I love each other, you enjoy the company and dynamic change after so many miles together!
The views just past the wilderness border. Stunning.
Finally feeling strong and definitely adjusted (even preferring it to the alternative!) to life on the trail.
Somebody please pinch me.
I can’t believe we only have a few more days out here. In some ways it feels like we’ve been doing this forever and in other ways it feels like we just started…excerpt from my journal on the evening of August 7th
Day 11- Gray Lake to Mount Rose Campground (12 miles), *resupply location # 3 of 3
Relay Peak, day 11
We reached the highest point on the trail, Relay Peak (10,338′), mid-morning. The monarch butterflies were migrating through and it was a site to behold.
Mount Rose Ski Tahoe in the background, Darren’s wintertime place of work for the last 25+ years.
We joined up with the trail that heads to Mount Rose Summit at Galena Creek, encountering many day hikers along the way. We crossed over State Route 431 and walked into Mount Rose Campground, where we were greeted by friendly campground hosts who gave us exciting news. A friend of ours had come by, reserved and paid for a campsite for us, and left us Coors Light in the bear bin. We might as well have won the lottery.
Cooler full of ice cold beverages- yes, please.
Our son brought up our final resupply that evening, as well as In-N-Out burgers and fries. This was a good day.
Highs & Lows
Dipping our weary feet into Galena Creek.
Having amazing friends and family that went above and beyond to help us out and treat us.
Seeing Tanner, our son, and spending the evening with him at our campsite (that had a…picnic table!).
With better cell service, real life and all its complexities was starting to creep back in.
We have a lot to deal with when we get home…troubles will always be afoot, but we can either wallow in them and let them steal the present or we can acknowledge that we can’t do much but pray and table it for another day…excerpt from my journal on the evening of August 8th
Day 12- Mount Rose Campground to Marlette Peak Campground (16 miles)
Mount Rose Campground, day 12
We woke up to a cool morning and got another early start. The mist rolled in as we were departing camp and it was an incredible sight to see it and the rising sun while we walked through the lush Mount Rose Meadows. We were now on the final stretch of trail, as well as one we’d completed in the summer of 2018.
Beautiful misty morning hiking through the Mount Rose Meadows.
At this point we were walking at a pretty decent speed, making 2.5-3 miles/hour, so we took the scenic loop option that overlooks Sand Harbor. Zero regret for the extra 1.2 miles.
This is where having a little knowledge about the trail comes in handy. We had read on the TRTA website all summer long (and had gotten confirmation from other hikers) that the water pump at Marlette Peak Campground was out of service. We loaded up on water at a creek just north of the campground and were good to go for the evening.
We secured ourselves a camp site (first come, first serve) at Marlette Peak Campground. The water pump was still out of service. By the time our heads hit the pillow, were surrounded by numerous other thru-hikers and backpackers, one of whom we let share our site with us.
Perfecting our tent site…just because.
Highs
The mist moved in AFTER we left camp in the morning…dew-free packing!
Hanging out at the Sand Harbor Overlook.
Finding water at a creek just north of Marlette Peak Campground (the fresh water well there was broken).
Ate lunch in one of my favorite places in the world. Best view of Lake Tahoe…excerpt from my journal on the evening of August 9th
Day 13- Marlette Peak Campground to Genoa Peak area (16 miles)
Another cold morning! We packed up and got out of camp before many others were moving. This afforded solo time in the Snow Valley Peak area (27°…brrr!) and more stunning views of both Lake Tahoe and Marlette Lake. Additionally, we had motivation to push on since we had a group of friends coming to meet us near Spooner Summit to bring us water and snacks and hike a few miles with us.
We still love each other!
Seeing familiar faces on the trail again boosted our spirits and motivated us to push though for the next day and a half. The cold beers, breakfast sandwiches, and potato chips helped too!
Friends. Such a welcome sight!
We set up camp ONE LAST TIME in a random off-trail spot below Genoa Peak near the ATV road. Doing everything for the “last time” became surreal as we realized…we were actually going to finish the Tahoe Rim Trail in the morning. So bittersweet!
Highs & Lows
Friends. And all the goodies they brought us. Such a treat at this point in the hike!
The 1700′ climb out of Spooner Summit in gale force winds tested our attitudes…but we were so close.
My feet would never quite be the same after this adventure…they would be tougher!
It’s hard to believe this is coming to an end. I’m really unsure if I’m truly ready to return to reality and all that comes with it, but we don’t have much choice. And so I’ll choose gratitude in these final hours on the trail…excerpt from my journal on the evening of August 10th
Day 14- Genoa Peak area to Kingsbury South (13 miles)
Our last time packing up camp!
So close, but so far. I think the anticipation of finishing made these miles feel longer than they really were, but looking back, I’m so thankful they were.
Parking at Kingsbury South is a bit of a tease; you feel like you “should” be there when you see the sign for Kingsbury North, but alas, you still have several miles of descent, followed by a final several mile, almost 800′ climb. That might not sound like much, but after 13 days of hiking and 185ish miles, it sure felt like it!
This look says, “holy $h!t, we’re actually going to finish this thing!”
The joy of seeing that Kingsbury South Trailhead sign was mixed with sadness as the reality that we were leaving the simplicity of trail life set in. A friendly and enthusiastic group of fellow thru-hikers we had been leapfrogging the last few days were at the trailhead to cheer us in.
We had finished.
We were back where we began, but we would never be the same.
After extensive research, review reading, and YouTube watching, we knew we wanted to go as light as possible, but also try to not break the bank with purchasing. Fortunately, as a couple, we were able to share a few things, which cut down on the total weight each of us carried. Below is the list of what we carried, what we ditched, and what we altered while on trail.
The “base weight” is all of our gear minus food and water, which ranged anywhere from 5-15 pounds, depending on how much water we had to carry and how much food we had left. By the time we added food and water to our packs, we were both sitting at about +/- 30-35 pounds, which felt very comfortable.
You become pretty familiar with your gear after you pack it and unpack it a few times!
I loved my Carry, Sleep, Sit system. In the future I would swap out the Z-Seat pad for a full length Z-lite. Having a sit pad was amazing, but I would have enjoyed the versatility of being able to also stretch it out and lay down or do some yoga on it at trail stops and camp.
The trekking poles were a new addition for me. I’d never used them for hiking or backpacking until I began training for the TRT. Between the weight I was carrying every day and my feet issues, these saved my knees as well as greatly assisted me on this hike.
Don’t let the hero stance fool you- I was pretty reliant on these trekking poles at this moment near the Twin Peaks area.
Warning: the NeoAir sleeping pad is very loud. If you’re a restless sleeper like I am, let that be a warning to you and any sleep partners or nearby campers.
I spent quite a bit of time researching, trying out, and swapping out clothing pre-hike. Overall, I was happy with my system. Since the hike was mid-summer, the layers I had worked well for both sleeping and hiking. You need a lot less out there than you think, and you have to carry it all, so consider that when deciding what to wear; no one cares that you’re in the same clothes day after day.
I would have preferred Teva-style sandals rather than Crocs for swimming/wading. I could have also hiked in these when my blisters were bad.
My blister issues had nothing to do with my shoes. I hiked too far the first few days without taking my shoes off at breaks, so my feet sat in sweaty shoes and socks for too long, making me susceptible to hot spots. I wore the same shoes on a cooler backpacking trip later in the year and had no issues.
Chilling and drying out at lunchtime in the Desolation Wilderness.
We took every possible opportunity to rinse out the clothes (socks, underwear, etc.) we weren’t wearing and hung them on our packs or in camp to dry. When you’re in the same clothes for that many miles, the funk is real. Staying as dry and clean when we could was something we constantly monitored.
2 x 1-liter Smart water bottles, 1-liter Platypus water bladder, small plastic bottle (8oz.) for coffee and green drink
The only other thing I wish I would have had was a real book. I had one on my phone but was trying to conserve my battery life each evening. A small paperback would have been perfect!
Darren– base weight = 18 pounds
What Darren took for a long walk around Lake Tahoe
Darren was pleased with all of the gear he selected and used on the hike other than his sleeping bag being too short. It was definitely a lesson learned. Tip- sleep a night in your sleeping bag or quilt before you go!
Darren was able to get away with a few less layers because he runs pretty warm most of the time.
Altras are a very popular shoe in the thru-hiking community even though they’re trail running shoes. Darren never had any feet issues on the hike other than 1 small blister. The Altras were trashed at the end of the hike, but overall he was very happy with his shoe choice.
Heads up: Altras are a zero-drop shoe, meaning the heel is at the same height as the ball of your foot. If you have never worn these type of shoes, it is recommended that you ease into wearing them to see if they’re a good choice for you prior to hitting the trail on day 1.
2 x 1-liter Smart water bottles, 1-liter Platypus water bladder
Because I carried the tent, Darren carried our medical/first aid kit and the water filtration kit. This worked well for us. The ability to share a few key items saved us each a few extra pounds.
When Darren was putting the medical kit together, I thought it was overkill. However, we honestly used almost everything he brought for my blistered feet. He packed a small pair of scissors, which I thought was ridiculous; I ate my words every time I cut another piece of moleskin or Leukotape (what I used to secure the moleskin).
It’s hard to know what your body is going to want on the trail, but the biggest lesson we learned was to keep it simple. Prior to the hike, we envisioned long mornings cooking a warm breakfast and sipping hot coffee, but this wasn’t at all how it worked out.
We set all our food out and packed it into gallon Zip-loc bags, one food bag per day. Our method of food organization evolved along the trail. Note- we saved and re-used almost every bag you see here.
We realized pretty quickly that we felt the best, physically and mentally, in the mornings and wanted to hit the trail as soon as we could. We’d share a bar as we packed up camp and then breakfast usually happened a few hours down the trail. Because it was summertime, neither of us cared about a hot coffee, so we would throw an instant coffee in our small water bottles and drink it while hiking. We also experimented and enjoyed cold soaking our oatmeal (putting it in a leak-proof container at night with water so it was soft and ready to go the next day, cold). The easier the better!
Food was one category where we overplanned and over-purchased. The first few days, we weren’t very hungry at all. I don’t know if this was solely our bodies adjusting to working all day or what, but neither of us ate close to what we brought, amount-wise. We reconfigured our food at our first re-supply, ditching quite a bit of what we had and only taking what we wanted.
Food becomes a tool out there, but also is an exciting part of the day!.
Breakfast Examples
Oatmeal with dried fruit, cinnamon (I put these together before the trip)- we used Talenti Gelato containers (they’re air tight) to put the oatmeal and water in the night before. The next day on trail it was softened and ready to eat!
Bars
Cold, instant coffee (mixed it in an 8 oz. plastic bottle each morning)
Organic Greens in powder form (since we weren’t getting fresh fruit and veggies on the trail)
Lunch Examples
Bagged tuna with hot sauce and crushed up goldfish or chips
Nut butter and honey in a tortilla
An incredible combination to match the incredible view.
Bars (I had a huge assortment of different kinds so we wouldn’t get bored); Lara Bars ended up being our favorites
Trail mix- the saltier the better! Costco’s giant bag with M&M’s was our go-to
Gummy fruit snacks
Chips
Peanut M&M’s, aka “trail eggs”…a must for any backpacking trip I take
In non-trail life I try to limit my sugar intake, but on the trail, these are a favorite and can literally brighten my day.
Simple is KEY. Trust me, the last thing you want to do after hiking all day is prepare a big, complicated, time-consuming meal. Try to eat as normally as you would at home, find versions of food you’re used to in backpacking form, and enjoy!
Food solves a lot of trail-problems. Grumpy? Eat a snack. Energy feeling low? Eat a snack. Feeling like you’re having a bad moment? Dig into your food bag and treat yourself to something you like (#peanutM&Ms). On a long climb that won’t end? A fruit gummy every so often gives you that little boost you need to propel you to the top.
Treats from friends are delightful! Missing…the breakfast sandwiches we scarfed down before the photo.
A Note About Water…
As previously noted, we hiked the TRT after a huge winter, water-wise, so finding water sources was not an issue. The longest stretch we had without any drinking water was Day 10, about 17 miles. On that day we loaded up to our carrying capacity with the containers we had, which was near 5 liters/each. Otherwise we packed 1-2 liters/each.
Filtering water via gravity with our Sawyer Squeeze.
The gravity filtration system worked well for us. It allowed us to fill easily and efficiently from each water source.
We took the opportunity in Tahoe City to clean our filter out, which improved the flow rate; however, the flow rate stayed consistent, averaging somewhere between 1:30-2 minutes per liter.
Because we invested in some lighter-weight gear, we spent more than you could if you already have gear. All in all, we spent approximately $4250 between the two of us, about $2125 apiece. This included both packs, our entire sleep systems minus the tent, water filtration/misc. supplies, most of what we wore, 2 nights in a hotel in Tahoe City at peak season, food, permits…everything Tahoe Rim Trail-related.
If you break this down by day, it comes out to be about $150 per day, per person. Most vacations are going to cost you at least this much in hotels, travel, food, drinks, etc. While it wasn’t a budget adventure, now that we have all our gear, we could do something of a similar timeframe for probably less than 1/4 of what we spent on this hike.
We purchased the majority of our gear from REI and Amazon. We have a Sierra Trading Post in town, so we frequented there as well.
To say we enjoyed the Tahoe Rim Trail is an understatement. Reflecting on it 6 months after completing it, I feel a sense of accomplishment that I didn’t quite feel at the end on August 11th. We were tired, dirty, and already partially back into our life at home that we knew we had to face when we stepped off the trail. We were sleep-deprived and ready for a bed, food, and sit-down toilets.
However, even though we were ready for the conveniences of off-trail life, we also weren’t quite ready to leave the trail. We loved the simplicity of trail life. Wake up, pack up, filter water, hike, eat, filter water, hike, eat, hike, eat, find camp, filter water, set up camp, eat, hang bear bag, sleep, wake up and do it all over again. It sounds like a lot, and yeah, it was a lot of work, but it was simple. Straightforward.
North of Shower’s Lake, day 3
Choices were limited. Our job was the trail. Our vehicle was our own 2 legs. Our entertainment was each other, others we met on the trail, and the views. Our food was predetermined. Our shelter was carried on my back. Trail-life is good life.
My feet were finally toughened up enough at the end that I could walk relatively pain-free. I made the remark to Darren that I wanted to turn around and go counter-clockwise now that each step didn’t feel like fire. I don’t think he thought that was very funny.
Doing something like this with your partner, in our case, your spouse, is a risk. Darren and I have a healthy marriage, of course with its ups and downs and issues like every other relationship, but on the whole we communicate well and we respect and love each other immensely. But, we had never attempted this type of adventure before. Leading up to the hike, we had disagreements in methods and ideas on things pretty consistently. Was I a little nervous to hit the trail as a married couple? Yes.
In our final hours on the trail just below Genoa Peak- still smiling and getting along!
However, the moment we got out there, it’s like we understood that each of us was attempting something hard. Something epic. Something we would never forget. We were experiencing a gift. Instead of taking the daily struggles and pains out on each other, we communicated how much we loved and were proud of the other person. Additionally, we laughed a lot, at ourselves and each other; humor goes a long way in improving your attitude.
How can you take anything too seriously with this guy around?
We spent most mornings walking either in silence or close to one another; in the afternoons we gave each other space and freedom to listen to music or podcasts on our phones (WITH headphones…please don’t be the person playing your music for everyone else to hear! Most people want their nature experience without a side of your favorite music). We even downloaded some of the same podcasts and would then discuss them later down the trail, which was also something fun to look forward to.
Regardless, if you decide to hike with a partner of any kind, come up with a few “WHY” statements before you hit the trail. Before you’re tired and dirty and hungry. We did this a week or so prior and it was very helpful to have something to go back to when one of us was feeling a little down or hurting. Our WHY was:
Disconnect to reconnect. With each other, God, ourselves, and creation!
Adventure. We are doing something together that neither of us have ever done before!
Gratitude. Live each day on the trail knowing we are doing something that a lot of people will never be able to do. We get to. We are consciously making the choice to be on the trail. Embrace it.
I can’t tell you how many times I remembered these 3 statements in the miles we walked, and how much they helped and encouraged me to keep going.
Relay Peak, day 11
Flexibility, letting go of expectations, and committing to being present go a long way not just in life, but also on the trail. We wanted to experience this, we made the decision to do it, we made it happen…and we will never be the same!
If this is something you’re even considering, even just a little bit, do it. You don’t even have to do the whole thing! There are numerous ways you can day-hike the Tahoe Rim Trail. Don’t let your (lack of) experience get in the way of an adventure of a lifetime.
Whether you choose to hike sections of a long trail, or try backpacking overnight, or even plan a thru-hike, just getting onto a trail will open your eyes to what’s out there beyond your walls, your doors, your comfort zone, your perception of what you can accomplish, and your thoughts of “maybe I’ll do that… one day“.